Using the standing rigging as antenna (part 3/3)

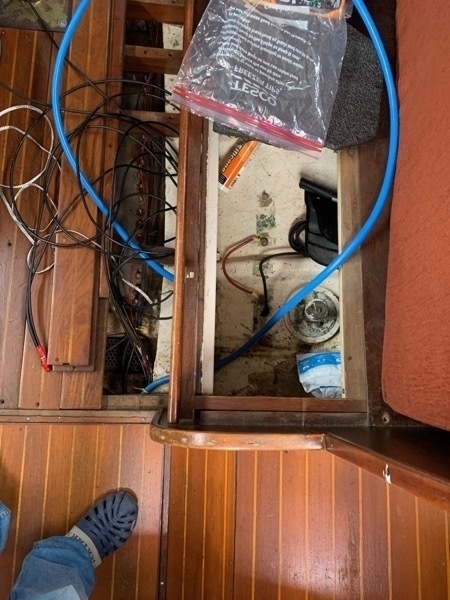
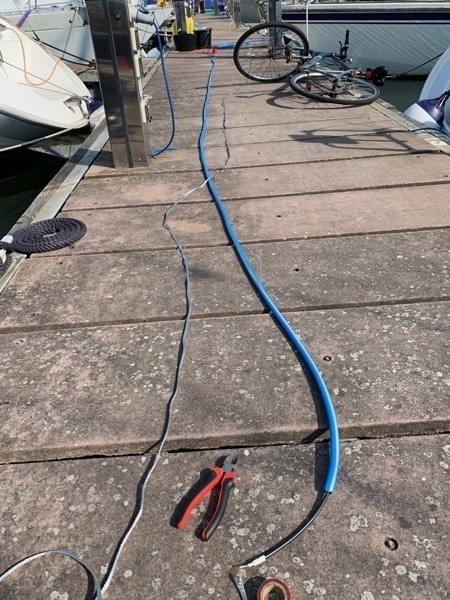
Today I took a day off so I could go to the Taste of Dublin Festival but in the morning I wanted to finish the installation of the cabling. So this was my starting point:

Pulling cable

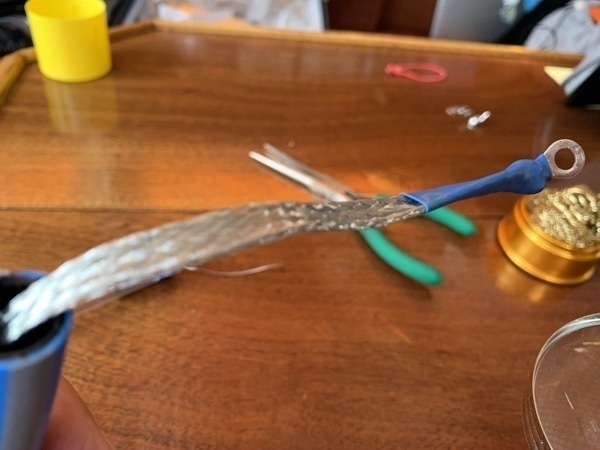
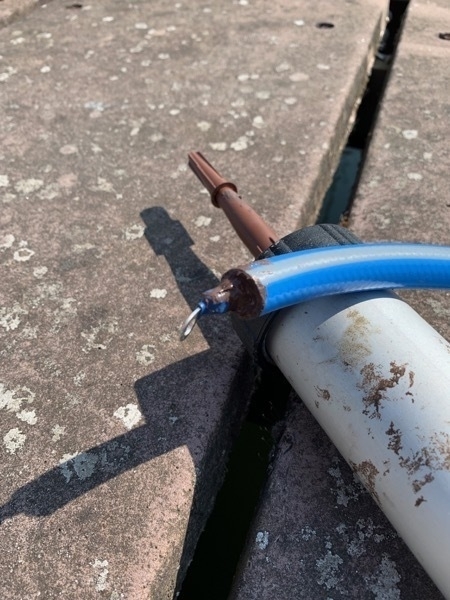
Again I soldered an eye into the end and closed off the cable so no moisture would get in. I also cleaned the copper contacts and sanded the corrosion off everything and treasted the surfaces with some compound I ordered from the USA: No-oxid. That should hopefully keep the connection electrically conductive in a highly corrosive environment such as a boat.

cleaned up connections

By the time I finished this it was time to go to the festival to meet my friends and continue later in the afternoon.

[some expensive food tastings in great company later…]

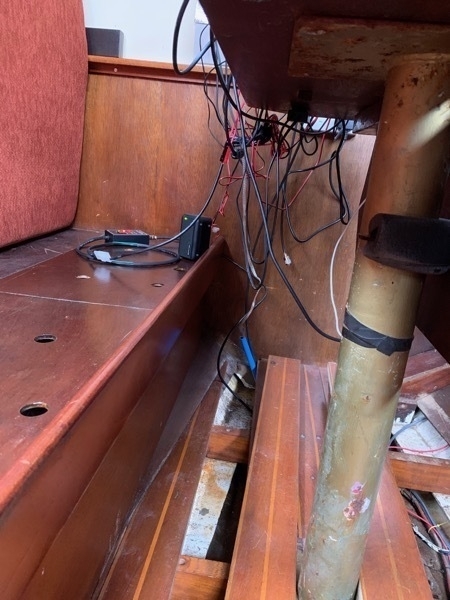
Now I had the controller and coax cable to install (also temporarily) under the floorboards of the cabin to the table. I need to change that once I go sailing but for now the location of my equipment in that corner suits me.

under the floorboards

It was a great opportunity to do some vacuum cleaning in places that I normally don’t get to:

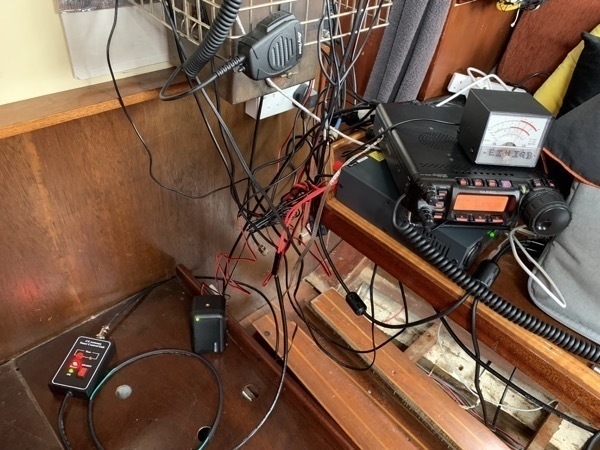
all these wires in the corner

And here you can see the controller for the antenna tuner and the grounding for the Yaesu rig attached:

it's working

The transmitter is set to 1.875MHz (the 160m amateur radio band) that I had never ever in my life been able to use before. The green LED on the controller box indicates that the antenna tuner was able to make the standing rigging resonant for this frequency. SUCCESS!

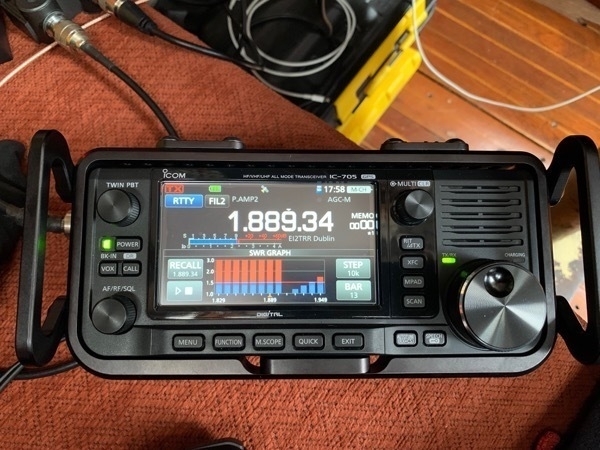
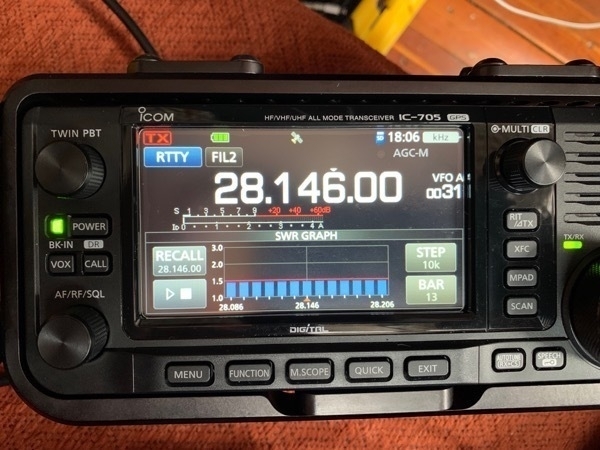
SWR test setup:

Test setup

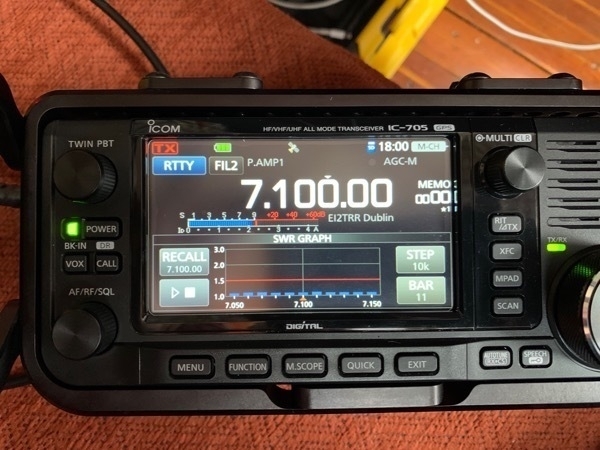
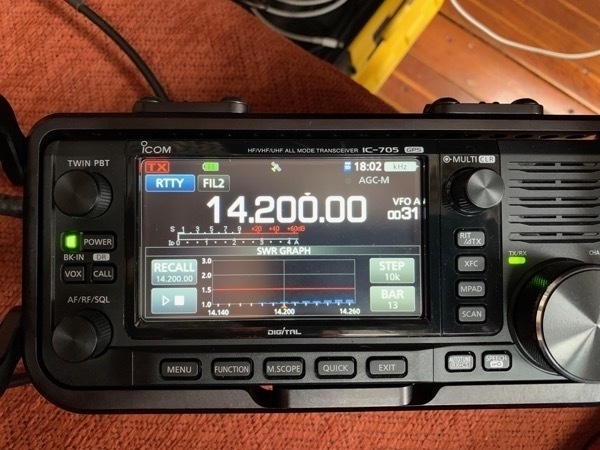
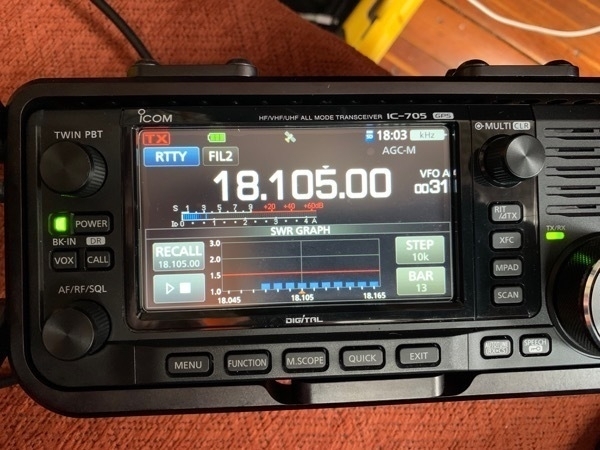
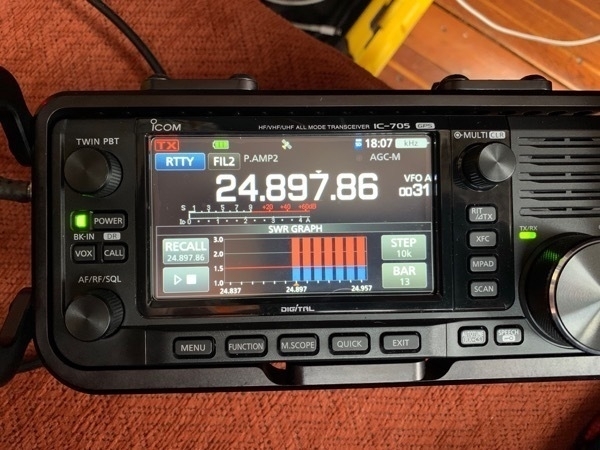
Here are the SWR graphs generated by the Icom 705:

160m SWR 80m SWR 40m SWR 20m SWR 17m SWR This rig can’t tune the 15m band but the Yaesu has no problem. I don’t know why yet… 15m SWR Same for 12m: 12m SWR 10m is fine: 10m SWR

(addendum 10/9/2021: I have also noticed that in wet conditions that the Icom 705 can’t drive the antenna tuner to tune where the Yaesu FT-857D can tune it. Needs to be investigated.)

That evening I made my first ever (FT8) QSO on 160m with Guernsey GU8FBO!

In general the antenna is working much better compared to the ATAS-120 and the YouLoop for reception. It’s a great addition to the boat/shack. I’m happy I finally set it up.

Using the standing rigging as antenna (part 2/3)

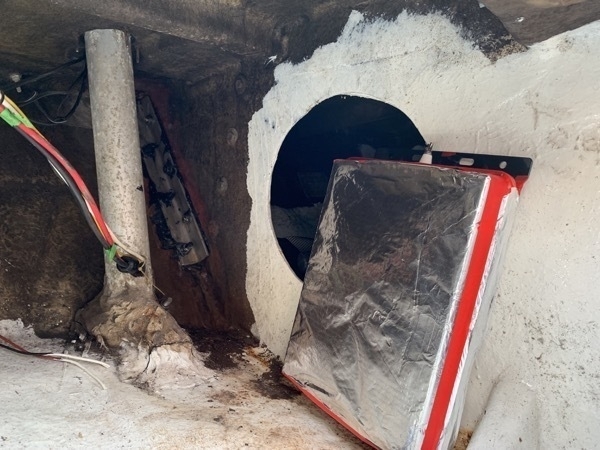
Another good day in Dublin to do work outside, this time we need to empty the starboard lockers so I can lay the garden hose I prepared yesterday and also install the antenna tuner in the small cockpit locker. I didn’t take a picture of all my stuff on deck. As it was a Sunday afternoon and not many people were around, I decided not to crawl inside the aft cockpit locker on my own. I got in up to my shoulders but was afraid that I wouldn’t be able to get out on my own! The reason I needed to get in there is to drill 4 holes so I could mount the antenna tuner inside, see the photo below:

No way I crawl in here on m own

You may wonder why I wrapped the antenna tuner in aluminium foil but this article from PA9X recommends it. When I finalise the install I may put it in a metal enclosure but this will do for now.

The device is kept in place by the bucket that contains part of the anchor so while I’m not sailing it isn’t going anywhere. I can look for a short or flexible person next Spring to finalise the mounting.

I also needed to connect a wire to the backstay outside:

backstay antenna connection

I laid the 3 cables: the garden hose with the braided ground cable inside, a coax cable and the power+control cable all together through the centre of the boat, under the engine mounts into the cabin.

No photos because I was too tired and dirty to do this and I was racing against the clock: I was ready just before 20:00! Later in the week I will finalise the install.

Using the standing rigging as antenna (part 1/3)

This is a long story so I’m splitting it up in 3 parts.

So, I have had a few stories about antennas and although I have been making some FT8 contacts with the little sprit on the back of the boat, it is not the best antenna. If you look at my boat there is a long metal wire almost going to the top of the mast. Some boats use that with the aid of insulators to create an antenna. But these are quite expensive. In any case you’d need an antenna tuner to make the antenna work with your transmitter. However as I did some research, one boat owner didn’t bother with the insulators and discovered that a modern antenna tuner can tune the complete rigging! So when I got a discount on the CG-3000 antenna tuner at Wimo, I decided to jump on it and hopefully improve the antenna situation on the boat.

Now this was a couple of months ago and I didn’t have the energy to deal with installing it because the long Covid lockdown just didn’t motivate me very much.

One of the things that are important when using a semi-vertical antenna, is a ground-plane. I already had some 10m of tinned, braided copper wire that seems a decent alternative for a copper strip that is the advised way of connecting to a ground plane. The boat also has a copper plate in the middle of the hull with connectors on the inside that is not used for the grounding of the engine:

Hull ground plate

But to get there I needed to lay a cable from the starboard aft cockpit locker to the cabin. The spacing is there but I wanted to protect the braided cable from moisture and abrasion. Some garden water hose to the rescue! I used rg-8x coax as a mousing line on the marina to get it all in:

laying out cables on the berths

Soldering an eye on one end with a bit of heat shrink to protect it from moisture:

soldering an eye on one end

And finally stuffing the open end of the garden hose with CT1:

No water will get in

That should make sure no water is coming into the hose! This was a good point to stop for the day. Tomorrow part 2 when we actually lay the cable.

Software Defined Radio and Windows on a Mac

As part of my plan to make some of the radio amateur band more accessible to me on the boat I have bought an SDRPlay RSPDuo. I receive a lot of QRM on the 40m band on my boat in the evening and given the fact that I can’t move anywhere nor can I drastically change my antenna situation I’m working on a plan using something called diversity radio. But that I will discuss in another article once I get closer to achieving that goal.

First I wanted to use the fantastic SDRuno software that at the moment only runs on Windows. As I have given up on my principles of using only Mac software a while ago, I’d thought getting it to work with my copy of VMWare Fusion 10 should be a no-brainer. Well…

Hardware

A MacBook Pro 2015 with 16GB RAM and a 2.5 GHz Intel Core i7 running macOS 10.14.6. So plenty of power to share with Windows. I also have a Windows 10 Home licence (although its activation keeps complaining but I bought an official USB stick with Windows dammit!). I decided to give Windows 4GB RAM and 4 virtual processors.

VMWare Fusion 10

The first thing we have to understand that if you sample 10MHz of radio spectrum at 14 bits, we are talking about a lot of data that needs to be transferred from the device to your Mac and then to Windows. At least 133MB/s of continuous data transfer over a USB bus! SDRUno uses a cool feature of USB to help with that, it’s called i-synchronous transfers. I now the Mac can handle this since I connected it to a DAC for hifi audio and that worked fine when I still had access to hifi in the dark days before the boat. But that’s where it went wrong because USB support is not easy in a VM environment since VMWare announced full USB3 support for the latest version Fusion 12. So I noticed that I could switch to bulk transfer in SDRUno but that was not great. I noticed a less than stellar performance. SDRUno would complain that the USB device suddenly disappeared and multi-tasking between Mac and Windows caused this to happen frequently.

VirtualBox 6.1

Since I tried not to spend another amount of money to upgrade VMWare Fusion I tried VirtualBox. This was a terrible experience both the UI and the data transfer suffered from lots of lag and hick-ups as it only supported USB bulk transfer.

VMWare Fusion 11

On my Mac I still use macOS 10.14 since the later OS versions are taking more and more control away from you and a lot of ham radio software doesn’t work properly. Thus I tried Fusion 11 as that is the latest supported release for my setup. I contacted VMware and I could purchase a licence for 12 and downgrade it to 11 if I have to. So I tried it with the demo version. It did support i-synchronous transfers but again it was not stable enough. Lots of times SDRuno complained the USB device disappeared and whilst decoding DAB it would just crash.

VMWare Fusion 12

I managed to borrow an even more powerful MacBook Pro running macOS 15 and I put Fusion 12 on it. Tried SDRUno again and it worked. DAB decoding worked as well. So that looked promising. But when I went to do some Mac work whilst listening to a DAB transmission it would fail again. So I was running out of options bar one.

Parallels Desktop

For some reason I didn’t consider Parallels Desktop. Looking at the price it seemed similar to a Fusion upgrade so that wouldn’t stop me. What I liked is that as soon as I started it it started downloading Windows and installed it for me. With Fusion and VirtualBox you have to do all of that manually. The other good thing is that it can pass the discrete GPU to Windows as well which SDRUno can use. So from the get-go it worked fine. Listening to DAB and doing all kinds of stuff on the Mac worked reliably. Sometimes you can hear drop-outs but it doesn’t crash nor make the USB device disappear. The only issue is that if you Mac goes to sleep and wakes up again you’ll use your USB device and have to restart SDRUno. It would be great it they could dynamically reconnect. You can also use Coherence mode which allows you to mix Windows and Mac windows in the same session as shown in the screenshot below.

So with this setup and I have listened many hours to my RSPDuo and it is an amazing piece of kit. I hope to write some more articles about my experiences with this radio and its software. I have lots of ideas and thanks to COVID lots of time to work on it as well.

SDRUno on Mac

SSTV reception from the International Space Station

Today I took the afternoon off from work to test if I can receive some SSTV images from the ISS. One of the alumni of the Moscow Aviation Institute is part of the Russian crew. They were running some experiments for the SSTV transmission capability.

First I had to check whether it was possible for me to receive it given the passes the ISS is making over Ireland. I’m using some software on the iPhone for this: Satellite Tracker by Star Walk.

I did make a mistake because the original time slot of 1620-1740UTC was a bit too early, however there was a pass relatively close:

Low pass of ISS

So I just switched on my Yaesu FT-857D with the ATAS-120A antenna on the back of the deck rack and hooked it to my laptop and lo-and-behold!

With this the full image:

SSTV image 7/12

I left the receiver running, suddenly I heard the second image pop up, then the signal dropped and reappeared again, must have been some interesting propagation path on the 2m-band.

second image ISS location

But I did get a more skewed image (which makes sense given the Doppler shift that must be more pronounced now as I didn’t change the tuning frequency):

skewed image 8/12

But with some correction it came out improved:

Skew corrected

Note there were 12 images in total to receive but given the time I made available, I’m happy I got one and a half!

Moving away from WhatsApp

Have you noticed this confusing screen on your WhatsApp?

IMG 4118

You’re not the only one! What’s going on?

I have been wanting to move away from WhatsApp for quite some time but unfortunately it is still taking first-mover advantage so people think that it’s the only game in town. And thanks to the EU we did get a bit of leeway with the dirty “grabbing them by their data” attitude of Facebook. However, they are going to try again and this time there is no opting out other than getting out, see this article in The Register. So before the of the month I will get out.

Of course I would love to stay in touch with you and I wholly recommend Signal as a better open-source and properly security vetted alternative. Follow the EU Commission and even Elon Musk who are all recommending Signal. I hope to find you there!

Check out this Tweet to see how easy it is to switch your group from WhatsApp to Signal.

Hardening a Raspberry Pi and MegaDV DMR

As described in previous postings I had a nice little package for my DMR radio experiments. I did notice however that there was a lot of noise when the unit was broadcasting on 144.950MHz that caused me issues with my FT-857D when I was working the local community on 145.575MHz. You can see a spectrum here when the MegaDV was broadcasting (thanks to Ana EI/EA7KMA for the loan of the SDR-RTL):

SDR spectrum image

And in general the noise level on HF was also higher when I had the unit switched on. So I bought a little aluminium enclosure from Germany. I also discovered that the CPU temperature was always around 55ºC and wanted to reduce it a bit. After talking to Mike EI2DJ he was able to cut some pieces of aluminium together with some paste to transfer heat from an IC. (Thank you again Mike!)

Today I finally had some time to move the Pi into its new enclosure. First I drew the PCB on a piece of paper with the area on the bottom with one of the ICs that I wanted to cool down drawn in. The CPU is on top and needs a heatsink but the MegaDV board is right above it so that is a future project. This allowed me to find the optimum placement of the pieces of metal as shown below.

The first metal plate was easier to place since there was enough free space for any pins sticking out the PCB. A bit of research indicated that Loctite Superglue should be suitable to glue metal to metal. And I put the heat transfer compound in between:

First metal plate

The second metal place would be in contact with the IC. Placement here was somewhat more critical since there are a few SMD components around it that are almost the same height. I also glued this with lots of heat transfer compound:

Second metal plate

After making sure everything fits and the Raspberry Pi was still working(!), I put some of the compound on the IC:

IC with heat transfer compound

Then it was time to reassemble it:

PCB in casing

You can see there is good contact between the PCB and the impromptu heatsink:

Heatsink visible

Now it was time to drill the hole for the external VHF/UHF antenna. I do have all the tools on board: vice, drill and Dremel. (I made a small mistake here because the top of the case had to be rotated 180º but it works.)

Top of case in vice

Once the hole was large enough, the antenna was fitted. However the MegaDV board needed a washer to keep it in place on the GPIO bus otherwise it would get loose when you screw the antenna back in (it’s the white-ish bit in the top left).

Hole ready to be filled

Now it’s working again:

Working Pi and radio

It has been running for the last 6 hours and the CPU temperature hovers around 45º so that is 10º less compared to the old case. I do not notice it is transmitting at all on the FT-857D unless I tune to about 10 MHz of the transmission frequency. So all in all a great success! (Once I can borrow Ana’s SDR-RTL again, I can see what the spectrum looks like now, to be continued).

We need to talk about water again

So… water on a boat. Most of the time you don’t want it but in one case you do: the water-tap in the galley. It had been dripping since mid-November and it was one of those jobs that should be easy but in the end are one of those never-ending stories.

When I noticed that the water pump would make a funny noise from time to time, it turned out that the drip caused the pressure to drop and the pump would kick in slightly. Given the history of these pumps, I’d rather not do funny things to them. So should be easy, get a washer, take tap apart, replace washer. It was very corroded and I couldn’t open it with a vice. Nope.

So, let’s find some time to go to Homebase and find a tap I like there. It’s a pretty long bicycle ride but it’s essential as far as I’m concerned. I find a nice tap but when I come back to the boat it has a 26mm hose opening and not 21mm. I would need to enlarge the hole near the sink and get a adaptor from the existing hose. Nope.

OK, so maybe I should get a caravan water tap in that case. I don’t like them, they look flimsy but given the COVID circumstances better a flimsy water tap than a dripping water tap. But when I got it by mail order 2 weeks later it was also not a good idea it turned out. I couldn’t connect my existing hose on it without an adaptor. Nope.

Right at that point it was a beautiful Sunday morning and I was fed up. I took the fancy taps I bought (oh yes they come in pairs and I only need one) to Homebase and take my existing tap and see what can be done.

Old water tap

I found a friendly kitchen salesperson, explained my predicament and he found (almost) exactly the drippy water tap I had brought with me. In pairs. I could go to the surplus area out back to find one but it may have missing bits. I’ll get the pair and fitted it in. Cleaned the old hose and washer inside. Connected it, turn on the tap. Water everywhere. Now that washer is leaking. Fortunately the washers I bought earlier worked even though the opening was a bit too small but now the pump needs to build more pressure and it can handle it. Case closed. Cross fingers.

Rope splicing course

I’m doing a rope splicing course online through Premium Ropes located in Amsterdam. Absolutely brilliant. I had all the tools on board but was planning to get to know them. Now I do and there are a number of jobs I have to do over the winter to make things better!

Here’s what they have to say on it:

Premium Ropes organizes workshops in Splicing Modern Ropes for yacht clubs all over the world. In two separate webinars we explain the various materials and rope constructions for modern ropes. We will also explain which rope is best to use for a specific application. But this webinar is mainly about ‘Doing It Yourself’. You will learn how to splice ropes consisting of Dyneema® or Stirotex fibres, splice with double braided polyester lines and make soft shackles. Many practical examples are also shown on how to apply this to your own yacht. During the Webinar there are opportunities to ask questions. At the end of the training you will have a better understanding of the materials of which ropes are made. You will grasp the basics of splicing and with the learned techniques be able to optimize your ship. Whether you are a cruiser or a professional regatta sailor: this is a workshop you don’t want to miss.

And here you see my results:

PHOTO 2020 12 10 18 51 25PHOTO 2020 12 10 19 34 01PHOTO 2020 12 10 19 42 28PHOTO 2020 12 10 19 55 02

Handheld Antenna Analysis with NanoVNA

Using the NanoVNA antenna analyser I did some analysis on my handheld antennas using a sweep from 144-440MHz centred around 292MHz. I did perform a calibration using the provided online documentation before I started all this.

I also used the provided SMA-JJ RG316 coaxial cables to connect the antennas to the analyser. I used the

nanovna-saver
software on my Mac connected to the USB port to control the analyser.

AnyTone D878 High Gain rubber duckie

This is the standard antenna provided with the AnyTone D878 handheld transceiver.

S11 return loss 144 440

S11 Smith 144 430

S21 Gain 144 440

Reteviz RHD771

This is an antenna I’d bought thinking it would be a better antenna to use “in the field”.

S11 Return Loss144 440

S11 Smith 144 440

forgot to save the gain image

Baofeng UV-9R rubber duckie

Standard antenna that came with my Baofeng UV-9R handheld transceiver.

S11 Return Loss

S11 Smith

S21 Gain

Feedback

Either to the NDR Whatsapp group or through my QRZ email.

Update 8/12/2020: this article from AD5GG is a nice introduction to some of these graphs as they relate to antenna tuners.

Roasted quinces cake

Ingredients

Roasting the quinces

  • 3 quinces, peeled, quartered and remove core
  • 250ml water
  • 250 g sugar
  • 1 bay leaf
  • 1 large piece of lemon peel (remove the white bit)
  • 1 cinnamon stick
  • optional: 1 star anise

Muffins

  • 150 g softened butter
  • 150 g brown sugar
  • 1 table spoon spice mix: see this site for the recipe
  • 3 eggs at room temperature
  • 2 table spoons orange blossom water
  • 150 g self-raising flour
  • 1 roasted quince in pieces

Preparations

Roasting the quinces

Pre-heat the oven at 200ºC. Add all the ingredient in a Dutch oven o.s.s. Put it in the oven for an hour, covered with aluminium foil. If you want to turn the quince parts 1 or 2 times. No lower the temperature to 170ºC. Remove the foil and roast the quinces for another 45 minutes. They have to be completely soft when you stick something sharp in them. Remove the quince parts. You can cool down the liquid and use it as a syrup for mixing or to drizzle over the muffins. Leave one quince apart for the muffins and cut it in small pieces.

Muffins

Pre-heat the oven at 180ºC. Mix the soft butter with the brown sugar and spice mix until the butter is aerated. Then, one by one, add the eggs. Only add an egg until the mix has absorbed an egg completely. Finally, add the orange blossom water. Now spoon the flour and quince pieces into the mix. Fill the muffin shapes and put in the oven. You can also make a cake in a springform of ~22cm (which I prefer). The muffin cook time is about 15-20 minutes, a cake would be around 40 minutes. You can check by sticking something sharp in it and it should come out dry. Let it cool on a roster. You can serve it with the syrup drizzled over it.

It was very good with a Killahora Rare Apple Ice Wine 2018

Original recipe to be found here.

And here I was eating it with my friends: Dessert time!

A BuJo lunch

It’s 15° here in Dublin. I have also had a craving for French fries since the start of lockdown. Let’s combine the two and throw some cycling in the mix to make myself believe I’m doing a healthy thing:

DMR hotspot on VHF

A couple of months ago I bought a DMR hotspot with the assumption that it was able to work on the VHF band (since I’m not allowed to work on UHF on my boat). But it didn’t do it! So, even though supposedly the MMDVM board would support it, it was minuscule SMD soldering so I gave up to fix it.

Luckily I was able to get a dual-band system but it would not fit the case of the Raspberry Pi Zero. That computer was also rather underpowered and so I have upgraded to a Raspberry Pi Model 3 B+ at the same shop. It also has more full-size USB ports so I can connect it to other equipment much easier.

It is working fine:

DVMega board in action

And on a legal frequency:

pi-star screenshot

You can see I was chatting with Jan, PA3CJP in the Dutch Brandmeister Talk Group 204.

Follow the Sun

Today I received my signed copy of the book that I helped edit and type-set: Follow the Sun — how to rebel scientists solved Covid-19.

“How do I happen to do something like that,” I hear you ask? Well, I’m glad you asked!

A long, long time ago in a galaxy far away...

False start. But when I was much, much younger (but just as stupid as I am now) I was the editor-in-chief of a magazine of the computer club S.T.A.C.K. at the TU Eindhoven. There was a porter working there who taught me a lot about the art of type-setting and I have always had a soft spot for doing this work. So when my dear friend Melanie O'Reilly asked me if I could help her out with this project she took on (in my spare time), I gladly agreed. It was a bit more work than expected but the result made everyone involved very happy. Even the printer and publisher gave positive feedback!

This is the front cover I designed, based on a photo I took in Malta in 2009:

Front cover

And the main author signed my copy in Irish:

Signed copy